
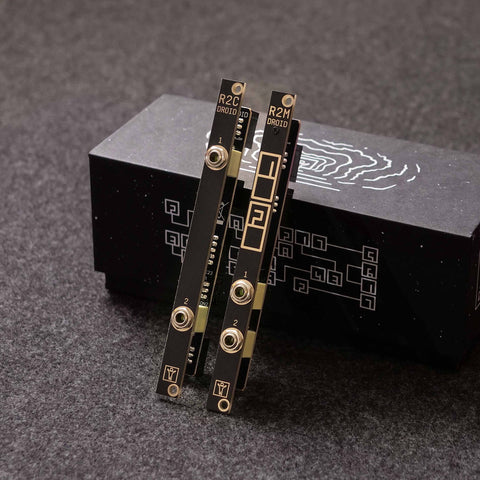


R2M/R2C - Controller remote connection
This is a pair of two 2 HP modules that allow you to connect a chain of controllers to your master through a standard 3.5 mm stereo cable (sometimes also called aux-cable). The usual idea is that you put all your Droid controllers into a skiff case and mount your master, X7 and G8 into another case, together with all your fancy Eurorack sound modules.
While you could do this with the typical 6-pin ribbon connector (e.g. the 80 cm version that we offer), using the R2M/R2C combination has some serious advantages:
- The connection cable can be almost arbitrary long (20 m have been tested and works perfectly).
- Since the connection is done on the front of the modules, you can quickly disconnect your skiff for the purpose of travelling to a gig.
- You can use a standard 3.5 mm stereo TRS cable for the connection.
These modules are not just passive connectors but contain special driver ICs that transform the electronic voltage levels, which run in the 6-pin ribbon, to something more stable and reliable that is fit for longer distances in a more hostile environment.
The controllers do not receive their power from the master but from the R2C module, which has a power connector and a voltage regulator for that purpose. Each chain of the R2C module provides the same power to its controller chain as the master does (it contains the identical voltage regulator). That means that you can connect up to 32 controllers (!) to one R2C.
Another nice thing: The R2M/R2C combination allows for two of these master / controller connections in parallel. That means that you can have two masters being attached to their individual controller chains. That does not mean, that each of the masters can access each of the controllers at the same time, however. Both master / controller connections work completely separately.
Package contents
- One R2M module
- One R2C module
- One Eurorack power cable for the R2C
- two 6-pin ribbon cables for connecting the R2M to two masters
- two 3.5 mm stereo TRS cables, approx 1.2 m
- 4 red M3 screws for mounting the two modules
Current Draw:
R2M: 3 mA +12V | 0 mA -12V | 0 mA 5V
R2C: 2 mA +12V | 0 mA -12V | 0 mA 5V
Width: 2 HP
Depth: 13 mm
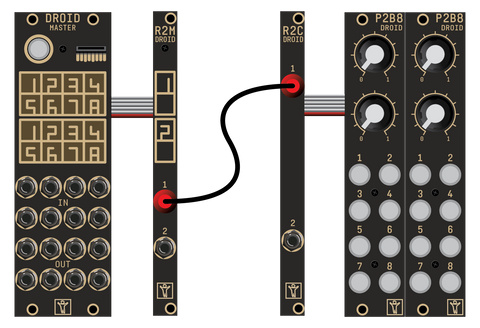
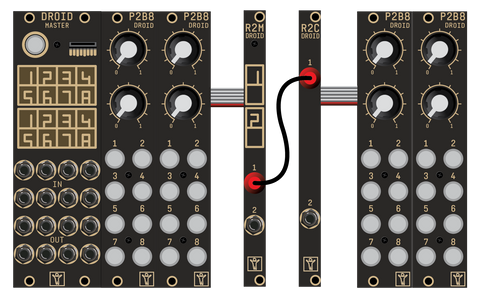
Image 1: Setup with one master
First let's assume that your have just one master. On the back of the R2M (M stands for "master") you will find two 6-pin shrouded connectors. These are labelled 1 and 2. Connect connector number 1 with the 6-pin ribbon cable to that output of the master that is usually used for the Droid controllers.
Mount the R2M next to your master. Mount the R2C (C stands for "controller") into your skiff and use the shipped 10-pin power cable for powering it with Eurorack power (red stripe down). Otherwise the controllers won't work. The R2C has two 6-pin connectors on the back, as well. Connect the first controller of your chain to the connector labelled 1.
Now plug one of the shipped 3.5 mm stereo aux cables to jack 1 of the R2M to jack 1 of the R2C. Or use your own 3.5 mm stereo cable for that purpose.
You don't need any changes in your Droid patch.
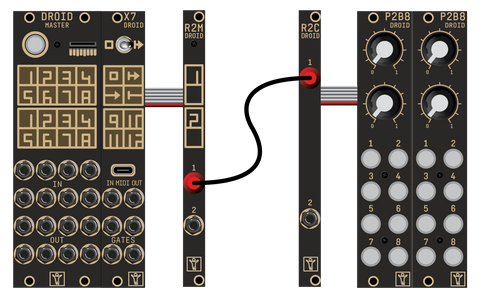
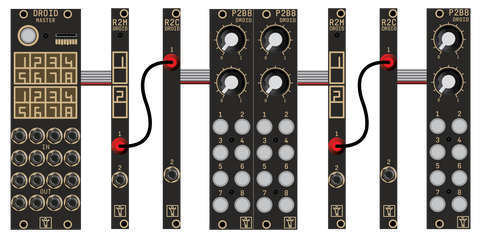
Image 2: Using with the X7
If you have an X7, connect the R2M to the X7, so that the order is master / X7 / R2M. Mount the X7 next to the master. Connect the R2M to the controller output of the X7.
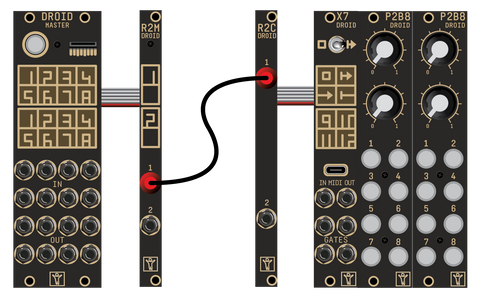
Image 3: X7 in the skiff
You can move the X7 to the "other side" of the connection by connecting the R2M directly to the master and using the X7 as the first module after the R2C. If you do this, the maximum distance that you can bridge is smaller, but 2 m should always be possible. This should be sufficient for almost any case.
Image 4: Controllers before the R2M/C bridge
You can put the R2M/C bridge at any position in your controller chain that you like. So it's possible to have some controllers directly connected to the master. Simply wire the last of these to the R2M.
Image 5: More than one bridge
If you have lots of controllers and put them in two skiffs, you can even use two R2M/C bridges and put a second bridge somewhere later in the chain of controllers.
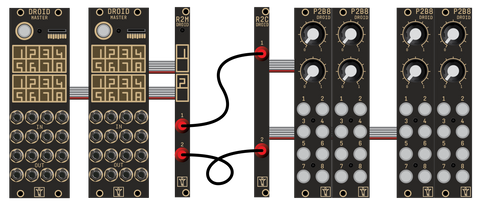
Image 6: Setup with two masters
As states above, the R2C/M is dual channel. You can create a second master / controller bridge with the same pair of R2 modules. Connect the second master to connector 2 of the R2M and its conntrollers to connector 2 of the R2C. Note: both master / controller chains are separated and cannot interact with each other.